Monday, December 31, 2012

Happy New Year, Punksters!


Hey Punksters!  This week Punky Sprouts is having a blog hop to celebrate 2012 and ring in 2013.  Each member of the Design Team are showing you some fun projects for your party or just for fun!  Hop along with us, leaving comments at each blog to enter to win a great Punky Prize Pack!  You could win an album of your choice along with Punky embellishments and a Lindy’s mist! 

Here is my project using Punky Sprouts embellishments!  It is super easy and a fun way to make a decorative ornament to hang for your party!

 Supplies:  2 pkg's of Lil' Blossoms Parchment, 1 pkg of Lil' Blossoms Lacy, Lil' Twiney (or any twine or thread you choose), Glitz Spritz (I used Royal Amber Fire), liquid glue or glue dots ( I used large Zots), decopauge, glitter, beads, scissors and a paint brush.  For this demo, I will use 2 small Lacy Blossoms and 8 small parchment Blossoms.  You will repeat each step with the same quantities of medium & large Blossoms.

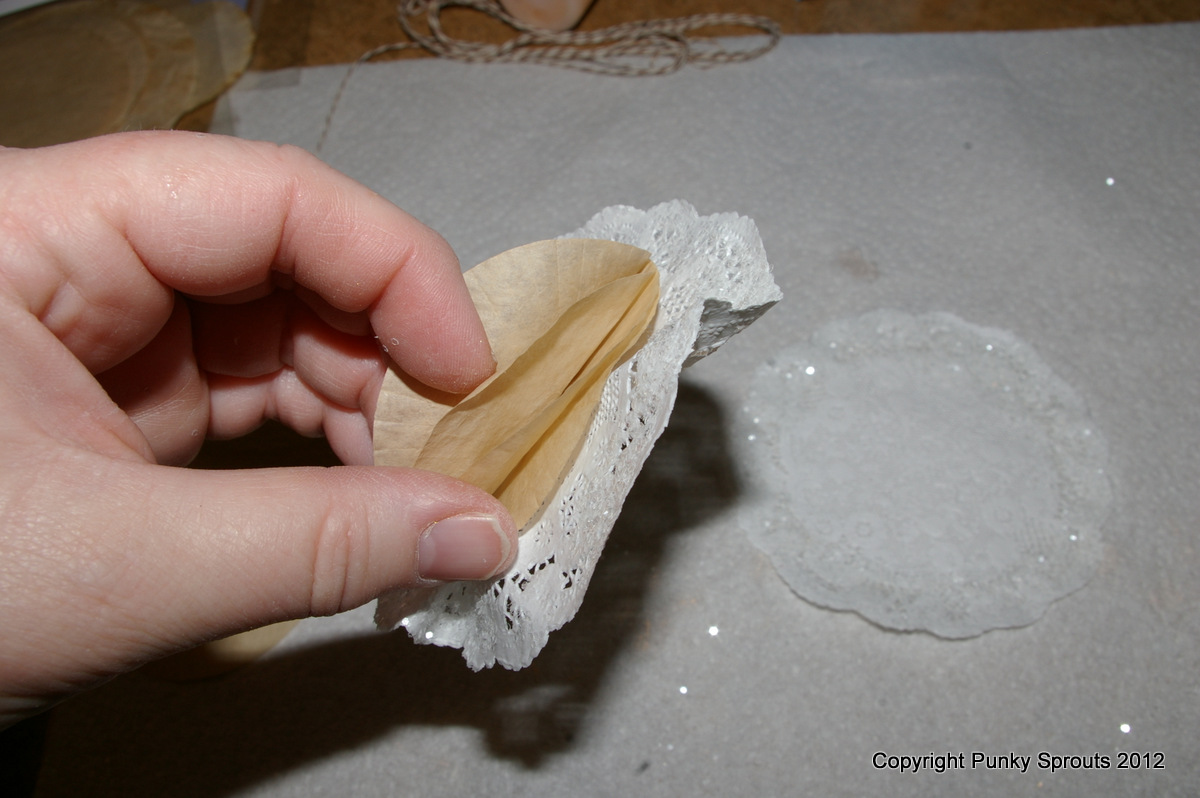
 The first step is to apply decopauge with a brush to the outside border of the doilies.  You will need 2 doilies in each size (small, med, large).  then sprinkle with glitter.  I love the clear glitter, but you can use any color you choose!  Trick - pour glitter over a coffee filter so that it is easy to catch the extra glitter and pour it back in the bottle.  


 Next, apply about a nickel sized spot of glue OR 2 large zots to center of the Lacy blossom. Pinch it in the center to pucker it - the glue will hold it together.  Gently flatten it back out.


Next, glue dot 4 of the parchment blossoms to the center of the puckered Lacy Blossom of the same size.  Layer them right on top of each other.  In the pictures, I am using the small doilies and the small parchment blossoms.


Begin to pinch and scrunch each Parchment piece pulling up and toward center.


 When all 4 layers are pinched and puckered, you can "fluff" them up with your fingers to make the ornament more like half of a ball.  Repeat these steps for the other half of the ball!

 When you have both sides complete, join them back to back threading your twine between them.  I placed mine with large at top in descending order. I used a large zot on the back of each half and layed the twine on the zot to make sure it was secure and centered.  Leave enough twine at the top to loop for hanging and enough twine at the bottom to dangle your beads and bling!  When you have them all secure, spritz with Glitz  Spritz (by Lindy's) and apply more glitter if desired.

String beads or any bling you choose to the bottom and hang!  Another idea would be to continue stringing together to make a garland...!
 I hope you like this idea and run with it!  These "half balls" also make great package decorations in place of a traditional bow.  All Punky Sprouts products used in this project, as well as Lindy's Mist Sprays are available here: http://getpunkysprouts.com/   Good luck!  Be sure to visit and comment on each of these blogs to win a Punky Prize Pack!!  Here’s the order of blogs in case you get lost along the way.


Punky Party Rules-Leave a comment on each designer’s blog and then on the Punky Sprouts blog to be entered to win the Punky Prize Pack.  Comments must be posted by midnight, Friday, January 7th PST to be eligible for the random drawing. 


Wednesday, December 12, 2012

Warm Winter Wishes


Warm Winter Wishes

Hi there! It's Shelly here wishing everyone a happy holiday season!  During December Punky Sprouts has swapped products with one of my VERY favorite manufacturers, My Little Shoebox! I was lucky enough to get the Secret Garden line, which has classic calico florals, polka dots & stripes in blues, yellows, pinks!  I love the MLS designs, as they exude nothing but happiness and joy...LOVE!  
So, while no snow has fallen outside where I live, I put plenty of snow on the holiday decor plaque I made for my door.  I used a 12" x 12" corrugated Punky Playground for my base and blue polka dot paper for the sky background.  Then I cut the cute prints into houses, roofs, doors, chimneys, etc.  Literally, the row of houses is all pieces I cut from the many prints in this line.  


I used Collage Pauge to adhere all the paper elements.  Then I used stamps, paint and markers to add detail and texture to the scene. To create the "snow" border,  I mixed an acrylic texture medium called White Opaque Flakes with a touch of white acrylic paint and applied it around the edges and below the row of houses.  Then I added a swirly title out of the cardstock stickers from MLS.  FUN project!   Don't be afraid to go outside your "box." This is all pieces of paper and cardstock stickers for the title.  I just used markers to outline everyone and a few stamps for highlighting the details.  Christmas Cheer!